How to Use Chat GPT in Google Sheets: A Step-by-Step Tutorial
Save Time and Increase Productivity with the Integration of Chat GPT and Google Sheets
Welcome to "Think For Me," the newsletter for AI enthusiasts who are always eager to learn something new. Today, we will be discussing how integrating Chat GPT with Google Sheets can make your AI experience more streamlined and efficient. If you're looking to enhance your workflow and increase productivity, this is the perfect tutorial for you.
But that's not all - I have a special treat for you! I've recorded a YouTube video tutorial to guide you through the entire process. You can watch the video by clicking on this link. So, sit back, relax, and let's get started with our tutorial.
Extension Installation
To start, open a new or existing Google Sheet that you wish to use with Chat GPT.
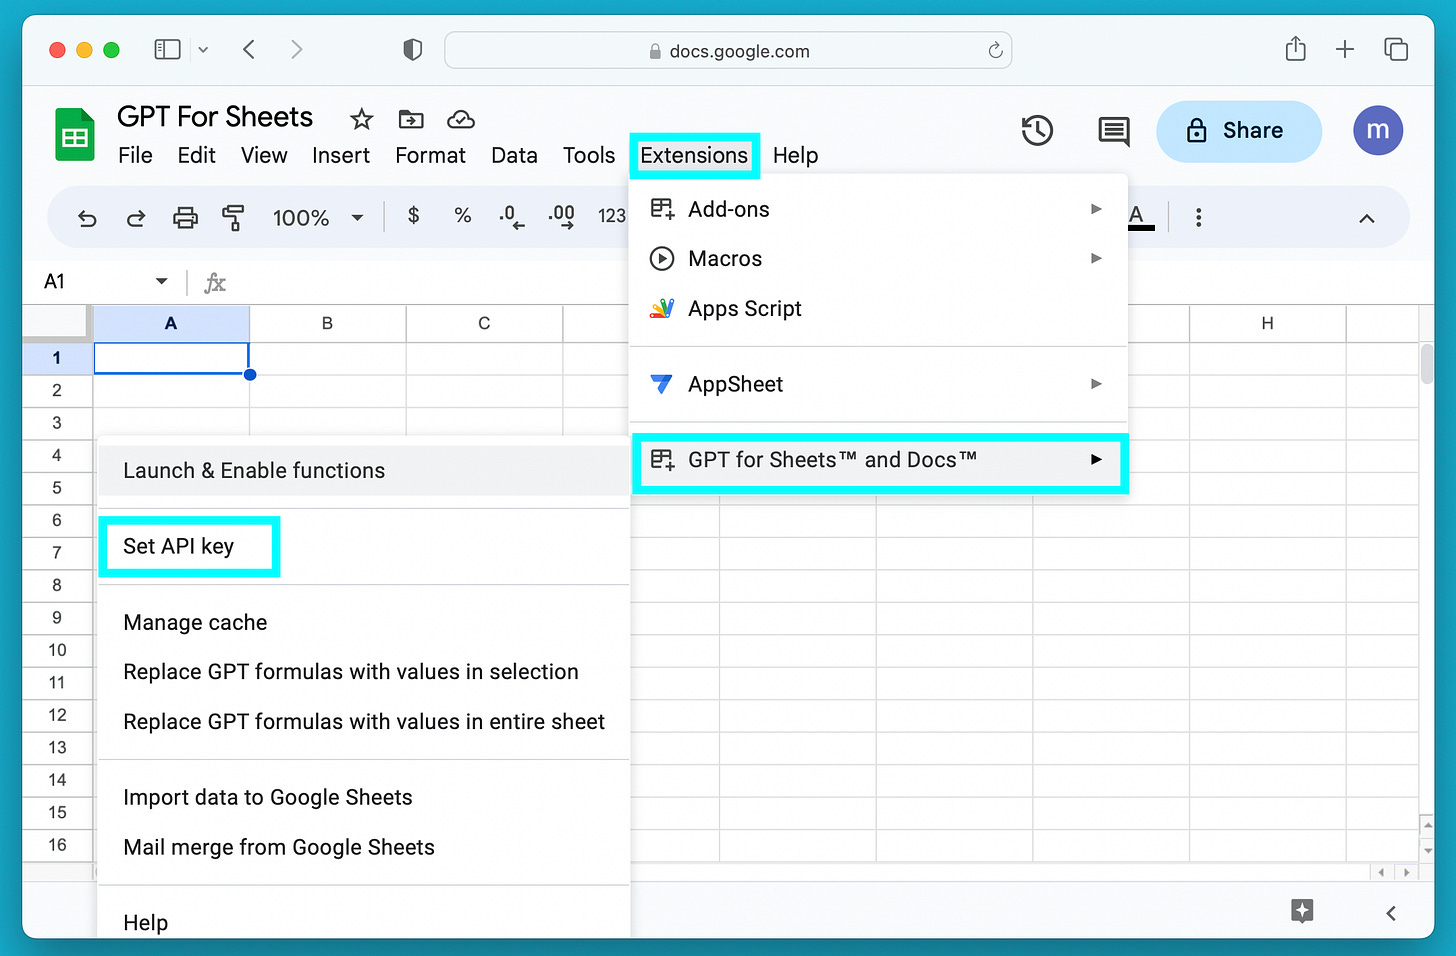
Click on "Extensions" in the top menu bar and select "Get add-ons".
Type "Chat GPT" into the search bar and select "GPT for Google Sheets and Docs."
Follow the steps to install the extension, choose your Gmail account, and grant access to your Google account.
After installation, click on "Next" and "Done." You'll see the extension docs on the right side, which is an excellent resource for learning about the different functions and capabilities of this extension.
Now it's time to set up our own API key
Head over to the OpenAi website, go to your profile, and select "View API keys". From there, you can create your own API key. Choose a name for it, such as "GPT Google Sheet," and copy the key.
Remember do not share this key with anyone else.
OpenAI is currently offering $18 free credit for all users to try out the platform, which can be checked in the usage section. If the free credit runs out, adding a payment method and charging your account is necessary. The good news is that the prices are affordable (only $3 or $5 a month for regular use could be enough). Check out the pricing section to learn more.
Last Step
After making your API key, set it up by clicking on the "Extensions" tab, finding "Set API-Key," and pasting the key in the designated field.
Now, we're good to go! it’s time to see this extension in action.
How to use it?
Let's say you're planning to apply to several universities in the United States. The first step is to create a comprehensive list of all the universities located in various states, such as New York City. Once you have compiled your list, you need to find out the admission requirements for each of these universities, which can be a time-consuming and challenging task. However, by using Chat GPT, you can simplify the process.
Here's how:
In the first column, we have to create a list of top university names. To use ChatGPT, simply type an equal sign followed by "GPT." Since we want a list of different universities, select "GPT list." Then, ask ChatGPT to provide you with a list of the top 10 universities located in New York City. We can use this prompt :
= GPT_LIST ("Write top 10 universities located in New York City"
Now, we can see a list of top 10 universities located in New York City.
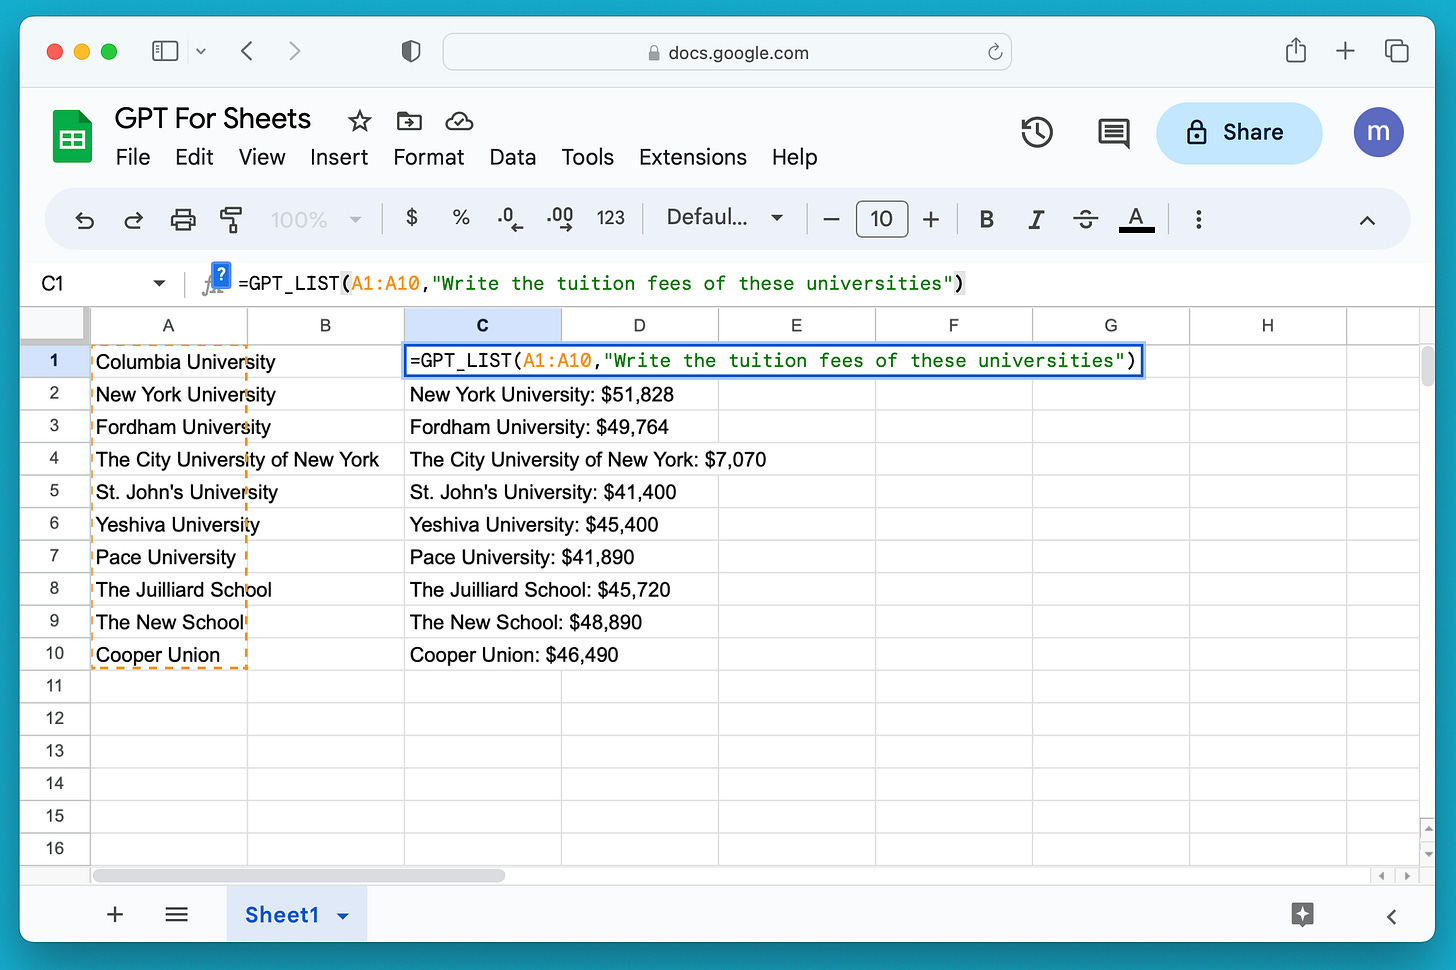
Next, let's use Chat GPT to collect the tuition fees of universities listed in the first column. To do this, use this prompt:
= GPT_LIST (A1:A10,"Write the tuition fees of these universities")
Thanks to ChatGPT, we were able to obtain this data in under a minute, whereas it would typically take hours of searching.
I hope that you found this article helpful and informative. To stay up to date on the latest AI-related content, be sure to subscribe to the "Think For Me" newsletter. 🙏


pretty interesting!